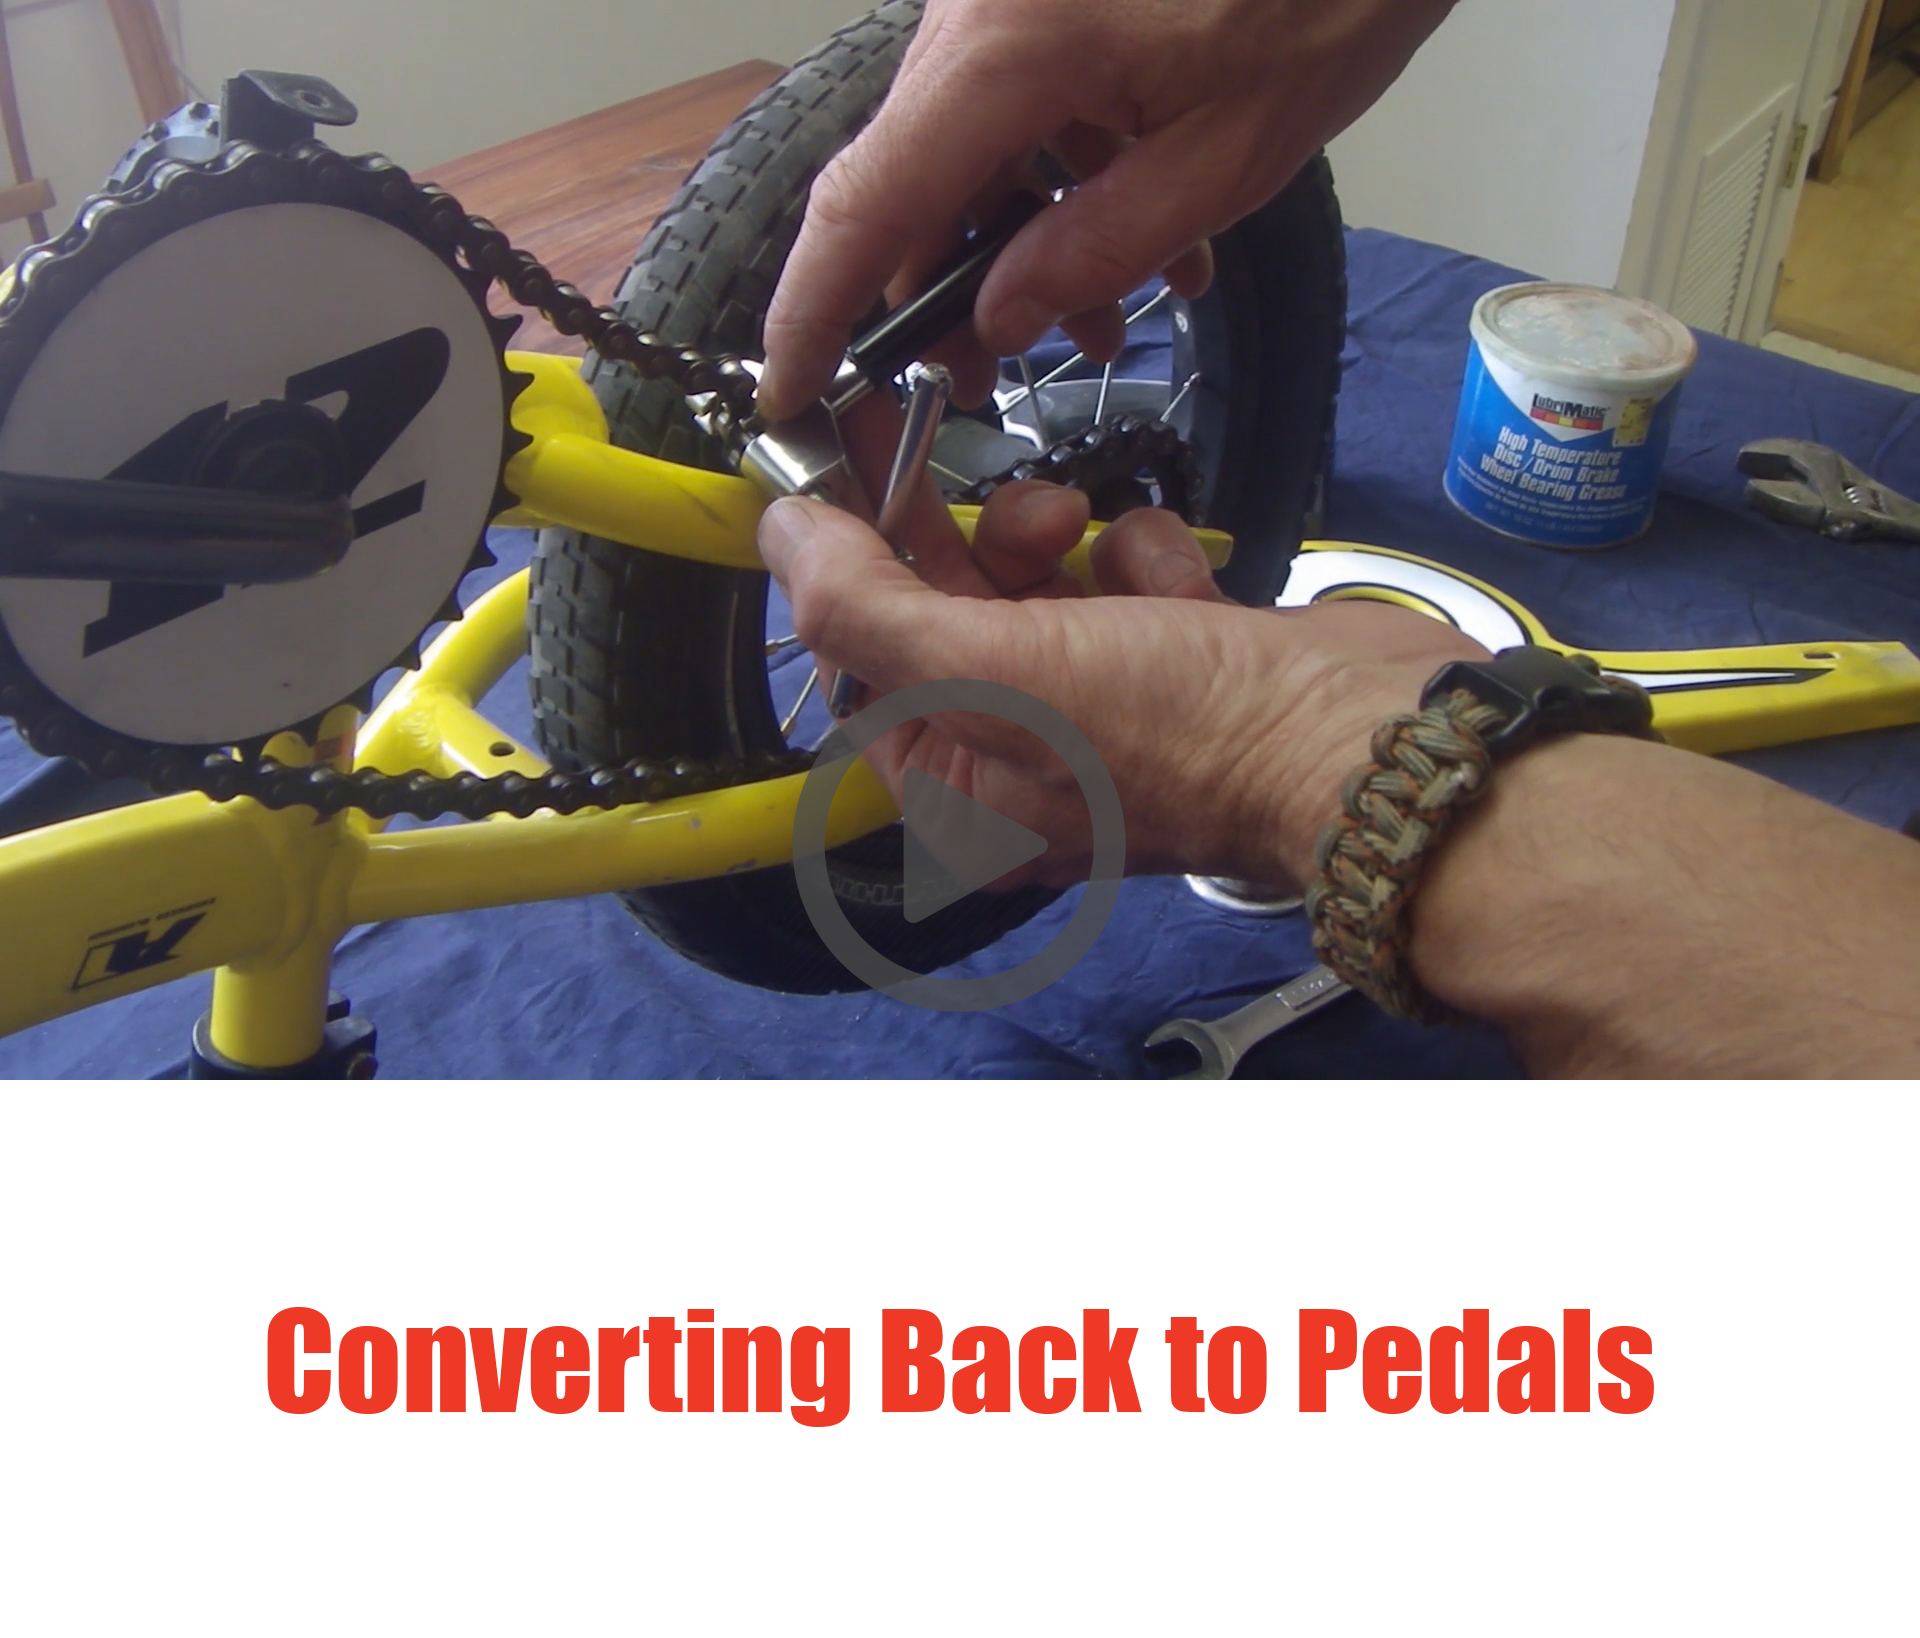
/*class="glyphicon-header"*/
Balance Bike Adapters Logo

All the fun, none of the hassle

Ride On!

Installation Instructions

Get Necessary Tools - You will need the following:
A 15mm open-end wrench, preferably a thin pedal wrench
A 32mm open-end wrench or a large adjustable wrench
A chain link tool
A spanning wrench or a small flat-head screw driver
A phillips head screwdriver
Safety glasses
Turn the bicycle upside down or mount it on a bike stand
Warning: Every time you use these wrenches on THIS project, you will be dealing with REVERSE threads. Pay attention. Also if the bicycle is older, the pedals and bottom bracket nut may be hard to remove. Be careful not to let a wrench slip and hit you. A LACK OF CAUTION MAY RESULT IN SERIOUS INJURY! If you encounter difficulty, take the bike to a qualified mechanic.
Remove the chain guard and then remove the chaing with the chain link tool.
Remove the crank:
Use the 15mm wrench to remove the pedal on the opposite side from the chain ring. Remember it is NOT "righty-tighty" on this pedal. It has reverse threads, so you will turn CLOCKWISE to remove.
Use the 32mm wrench or adjustable wrench to remove the thin nut that holds the crank components in the bike's bottom bracket. Again, REVERSE threads.
There should be a washer with one or two "teeth" on the inside that locks the bearing nut in place. This should pull straight off.
Use a spanning wrench to remove the bearing nut. If you do not have one, carefully slip the small flathead screwdriver into the slot on the bearing nut and push CLOCKWISE. Be careful to push away from your body to avoid poking yourself should the screwdriver slip.
Carefully fish the crank through the bottom bracket.
Remove the bearings from both sides of the bottom bracket.
Store parts:
Place all the smaller components from bottom bracket into the polybag that the Balance Bike Adapter came in.
Seal it up and put it somewhere you can find it!
Install Balance Bike Adapter
Wipe out bearing races - the chrome colored cups in the bottom bracket - to removed any grease.
Put an O-ring on each of the larger cylinders of the BBA. Each side has a small indentation to hold the rings.
Insert hex bolt into the appropriate side of the BBA and insert both ends into the bottom bracket.
Snugly tighten the hex bolt with the included hex wrench. This bolt is a normal thread. There is no need to over tighen. Rather simply check the BBA periodically for tightness.
Re-attach the chain guard to cover any sharp edges of the chain guard brackets.

Congratulations!


Save Money

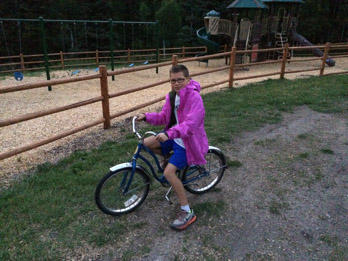
Balance Bike Adapters cost a fraction of what a dedicated balance bike does.

Save Time

Don't spend precious time shopping for TWO bikes, one of which will be obsolete in two months. Buy one quality bike and a Balance Bike Adapter.

Save Resources

A Balance Bike Adapter conserves resources and requires less energy to manufacture and ship.

Instill Confidence

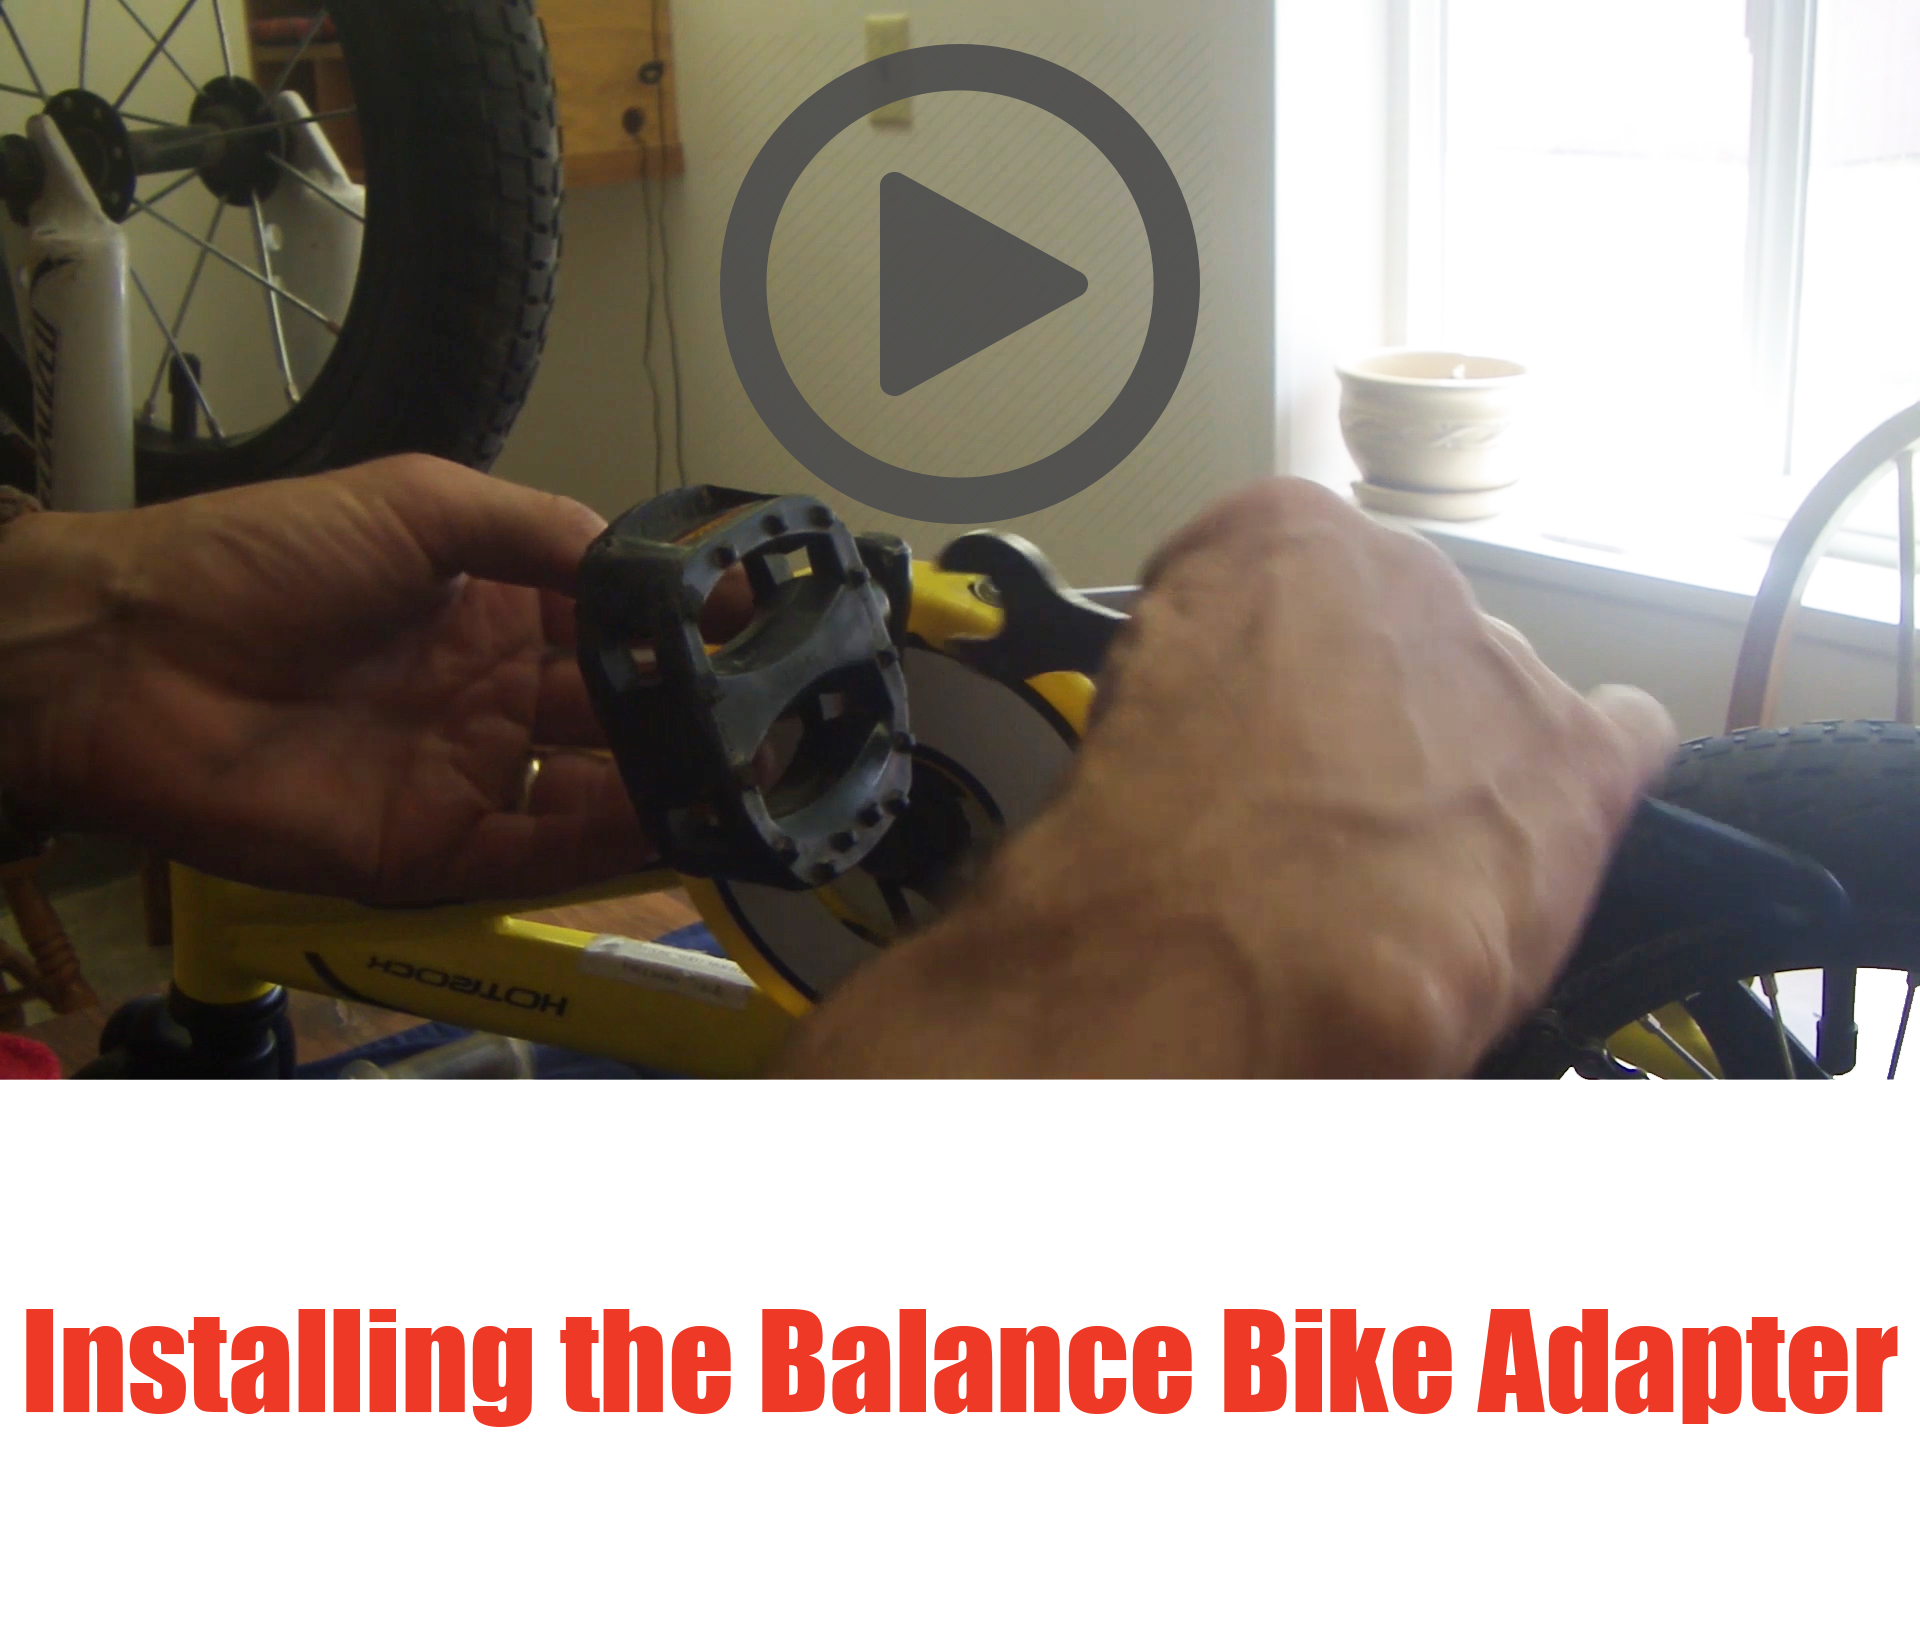
The BBA is easily installed, so that you can begin teaching your child, and perhaps yourself, baisc bicycle maintenance.


Video Instructions


Contact Us

Balance Bike Adapters, Inc.
260 W. Iowa St.
PO Box 448
Union, OR 97883-0043, US
P: (541) 910-3697

Social

Testimonials

"Great Product"

This is a great product! Easy to install, a very simple process. We live in a rural community, on a gravel road and training wheels are not effective or useful.... Read More...

Why Get a Balance Bike Adapter?

Balance Bike Adapters (BBA's) complement high quality bikes:
A high quality bike will last a family years! Click the photo from 2016 below. My son is riding a Schwinn that his oldest sister got as a 5-year old in 1993, and it was old then! Cheap bikes frustrate child and parent alike due to the constant maintenance required. Buy a quality bike and put our high-quality machined aluminum BBA on to protect its components.
Quality Bicycle
Balance Bike Adapters Save money and time:
Rather than spending a money on a dedicated balance bicycle, put a little extra money into a higher quality pedal bike and convert it to a balance bike using the BBA. Once your child has mastered balance and steering using the Balance Bike Adapter, convert the bicycle back to a pedal bike.
Introduce your child to bicycle maintenance:
Follow the simple written or video instructions and introduce your child to basic bicycle mechanics. They will gain independence by learning to fix simple things on their bikes!
Balance Bike Adapters Conserve resources and space:
The BBA not only saves money and time, it also conserves resources and significantly reduces storage space. Drop the Balance Bike Adapter in the original polybag and store it in a draw. When the next child needs it, pull it out and reinstall it. There are no balance bikes cluttering your garage or hassles over selling one. You can spend your time riding with your family!

Return to Top